Pie for Amy

August 28, 2009

silkylemonpie

Tomorrow is a big day for Amy Snider, my friend, colleague and occasional guest blogger on this board.

I love that she and her fiancé Tim have planned a wedding that reflects who they are and what they like do. The wedding is to be outdoors on Amy’s parent’s sheep farm and instead of formality and dancing, there will be Bermuda shorts, lawn bowling and croquet. On the menu is one of her Dad’s lambs and for dessert they’ll have lots and lots of pies. That’s right, despite intense peer pressure from people like me, they’re foregoing cake to have their favourite dessert instead. I like them all the better for it!

So, in honour of this celebration, I offer you a recipe for one of my favourite pies. I hope you’ll make it tomorrow and toast Amy and Tim’s happiness when you take your first bite:

Silky Lemon Meringue Pie

Crust:
1/2 cup (125 mL) butter
1 pkg (250 g) softened brick-style cream cheese
2 tbsp (30 mL) icing sugar
2 cups (500 mL) all-purpose flour

Filling:
1/2 cup (125 mL) butter
1 cup (250 mL) granulated sugar
3/4 cup (175 mL) lemon juice
pinch salt
6 egg yolks
1 cup (250 mL) sour cream

Meringue:
1/3 cup (75 mL) granulated sugar
4 egg whites
1/4 tsp (1 mL) cream of tartar

Pastry: Preheat the oven to 375ºF (190ºC). Beat the butter and cream cheese until smooth. Add the sugar and mix on low. Add the flour mixture and stir until combined and crumbly. Shape into a ball and knead two or three times or until smooth. Roll thinly and fit 9-inch (23 cm) pie plate. Refrigerate for 15 minutes. Poke all over with a fork. Line with parchment paper and fill with pie weights. Bake for 15 minutes. Remove paper and weights and bake for 10 minutes or until golden.

Filling: Melt the butter in a saucepan set over medium heat. Remove from the stove and whisk the sugar, lemon juice and salt. Whisk in the egg yolks and cook, stirring constantly with a wooden spoon, until mixture comes to a boil. Reduce the heat and cook, stirring, until thick and mounding on the spoon. Cover and bring to room temperature with waxed paper touching the surface of the filling. Gently stir in sour cream and scrape into prepared pastry.

Meringue: Preheat the oven to 375F (190C0. Place egg whites in a clean, dry bowl and beat until frothy. Add the cream of tartar and continue beating. Add sugar, a spoonful at a time, until eggs are full and glossy. Spoon over top of filling and spread to the edge of the crust. Place in oven. Bake for 5 to 6 minutes or until golden. Makes 8 servings.


Say “yes” to pie!

April 22, 2009

A Piece of the PieJust like casseroles, pie is back! I know that since last October I’ve made more pies and tarts than ever before and at my dining room gatherings, pie has definitely been the new cake!

While recipes for great pies are bouncing around the internet at frenetic speed, places that make great pie are also getting their fair share of attention:

Three Sisters Pies in Alberta is a much-loved staple at the Millarsville Farmers’ Market because their dessert pies made from premium, regional, ethical and organic ingredients make people feel good about eating pie while their super flaky, hand-crafted flaky pastry makes doing the right thing a pleasure!

Gourmet on the Lake’s Muskoka Food Boutique has an entire day of the week devoted to pie! That’s right, every Friday they have a full roster of fresh sweet and savoury pies ready for their customers to take home and love as their own!

And, if you’re thinking that this pie pandemonium is just a Canadian thing, guess again. According to this post in The Nibble, pies are quite often the preferred choice in the US right now, too.

Can you recommend a place that makes great pies in your area? And, what do you prefer: cake or pie?

BTW, if you feel like baking a pie yourself, you might find these previous posts useful:

Ten Double Crust Pie Tricks

Choosing a rolling pin

Tarte tatin


Choosing a rolling pin

March 13, 2009

rollingpinsSince so many bloggers are taking advantage of the numeric poetry of tomorrow’s date (3.14= ∏) by making pies, I thought that today we should discuss an essential pie making tool: the rolling pin.

Rolling pins are an iconic kitchen tool and almost everyone — even infrequent bakers — have one stashed in a drawer or at the back of a cupboard. Some people love their rolling pins because they help them to create flaky pastry and others find them a reassuring part of their home security kit. While any kind of pin will work as a weapon, choosing the right pin is more important when making pastry.

Although rolling pins can be made from wood, stone, plastic, stainless steel or even glass, in my opinion, wood is the way to go. I have a fancy marble pin but I find it too heavy for making laminated doughs such as puff pastry and Danish pastry; it literally shoves out the butter on the first and second turns of the dough.

In terms of shape, there are two kinds of pins to choose from:

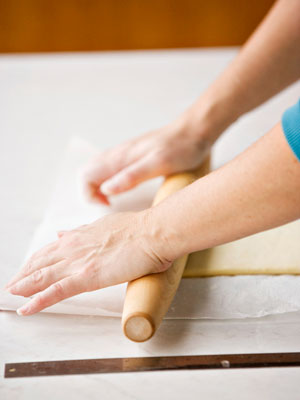
Rods: Also called French rolling pins, these tools are rolled across dough using one’s palms (see above). This style of pin is my preference since it’s easier on your hands and wrists and it exerts fairly even pressure on the dough, so that each sheet is evenly thick after just a few passes.

Rollers: These pins have a thick centre cylinder and two thinner cylindrical handles on each end that are attached to an inner rod that allows the larger cylinder to roll freely. Roller-style pins are used by grasping the handles and pushing the pin across the dough.

Although rollers are likely the most common rolling pin for sale here in North America, they require the exertion of a lot more force than a rod since your energy isn’t distributed evenly along the pin. As a result, dough is often stretched less evenly when you use a roller-style pin since more force is exerted closest to the ends. And for me, grasping the pin at either end leads to hand and wrist fatigue, especially when you’re baking a batch of pies or doing big batch holiday sugar cookie baking.

What about you?  Do you have a preference for one kind of pin over another?


Pie Day Tarte Tatin

February 16, 2009

tartetatinAs much as I love my own family and as glad as I am to have a government holiday today, I still want to change the name of  our  holiday from Family Day to Pie Day. I’ve already voiced my reasons so I won’t bore you by repeating them again; however, I will share with you the pie that I’ll be making for my family today: a warm, wonderful tarte tatin!

This classic French dessert uses puff pastry but my version can be made with short pastry, too.


Classic Tarte Tatin

6 peeled, cored, thickly sliced firm apples,

such as Gala, Spy or Spartan

2 tbsp (30 mL) lemon juice

1 tsp (5 mL) cinnamon

1/4 cup (50 mL) butter

1/2 cup (125 mL) granulated sugar

 8 oz (250 g) pkg thawed, frozen puff pastry

rolled to fit over skillet

Preheat oven to 425oF (220oC). Toss apple slices with lemon juice and cinnamon. Melt butter in a 12-inch (30 cm) ovenproof skillet set over medium-high heat. Sprinkle in the sugar and stir to combine. Arrange apples in pan in a circular pattern. Reduce heat to medium and cook, without stirring, for 15 minutes or until a golden caramel has formed in the pan.

Arrange  the pastry over top of fruit so that apples are completely covered. Fold over the edge of the pastry to fit inside the pan snugly. Transfer pie to the preheated oven. Bake for 20 to 25 minutes if using puff pastry or until pastry is golden and crisp. (If using short pastry, reduce baking time by about 5 minutes.) Turn pie out onto a large platter. Spoon any juices remaining in pan over top of pie. Makes 8 servings. 

Tips:

– Serve with whipped cream, vanilla ice cream or thinly sliced pieces of aged cheddar cheese.

– If using frozen apple slices, defrost completely and drain well before adding to pan.

Happy Family Day! See you back here tomorrow.


10-double crust pie tips and tricks

November 25, 2008

applepie

Baking is my first love and, although I’ve been baking cakes, cookies and even bread successfully since I was a kid, double crust pies used to be my nemesis.

The filling was often too runny; the bottom crust was sometimes soggy and my top crusts sometimes ballooned up during baking only to collapse when the pie was cut. Worst of all, the edges of my pies were rarely pretty unless I made a cardboard textured crust. All sad but true facts from my tortured past (like all artists, we bakers suffer!).

Over the years I’ve worked on my pie-making techniques by practicing, reading and quizzing professional bakers. I’ve learned a lot of important lessons and now, about 95% of the time, I make damn fine pies.

Shortcut your way to pie making success with these tips, gleaned on my journey from pie shame to pie pride:
1. Because I have warm hands, I use a food processor to make pie crust so that I handle the dough as little as possible.

2. If a pastry recipe says you can use all-purpose flour or cake and pastry flour, I use the all-purpose. It’s easier to roll and move than C&P based pastry.

3. I like to use a tapered rolling pin instead of one with handles. It’s easier to roll the dough to an even thickness. I also find my wrists get less fatigued when making a lot of pies if I use this type of rolling pin. I had a marble rolling pin which is prized for being cooler than wood but it was so heavy that it compressed the fat and flour so the resulting crust was not as flaky as it should be.

4. When making a big pie (over 9-inches/23 cm) in diametre, I like to roll the dough out on waxed paper so that it has support when being moved. In fact, I often roll the top portion of dough on waxed paper and then transfer it to the refrigerator to rest. Then I roll out the bottom crust, line the pie plate and place the lined plate in the refrigerator while I prepare the filling.

5. Although I’m still not the world’s best crimper, I’ve learned to roll out enough dough so that there is ample overhanging dough to make a pretty edge.

6. If using frozen fruit, thaw completely before using and drain off all liquid. If you want to use these juices, reduce them in a saucepan or thicken them with cornstarch before stirring them back into the filling mixture.

7. Cut lots of little vent holes in the top crust instead of several larger vent holes to prevent the crust from rising and forming air pockets as the pie bakes.

8. Always bake pies on the very lowest oven rack so that the bottom crust is exposed to the highest heat possible. (I’ve tried cooking pies on a preheated pizza stone and it works quite well, by the way).

9. I always use a glass pie plate so that I can lift up my pie and check to see if the bottom crust is golden. If it isn’t, the pie bakes longer no matter what the recipe says.

10. Always bake fruit pies until the juices are bubbling. They don’t have to bubble over like my apple pie posted above but they must be boiling for the juices to thicken.

Have you ever had a pie making disappointment? If not, what tips can you share that ensure your pastry prowess?

 
Also:  Happy Thanksgiving to my American readers!  I hope you enjoy a wonderful meal with people you love to be with!